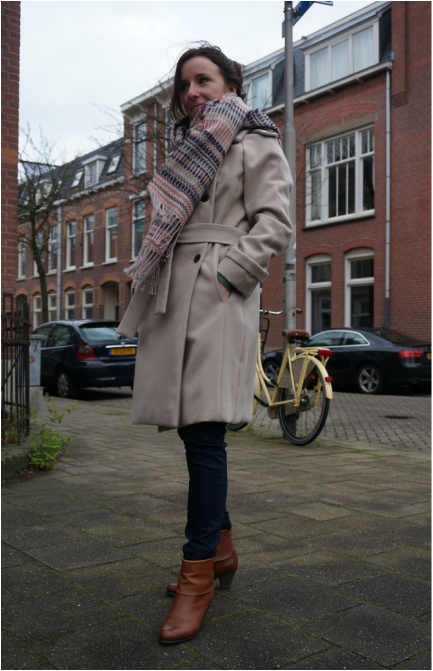
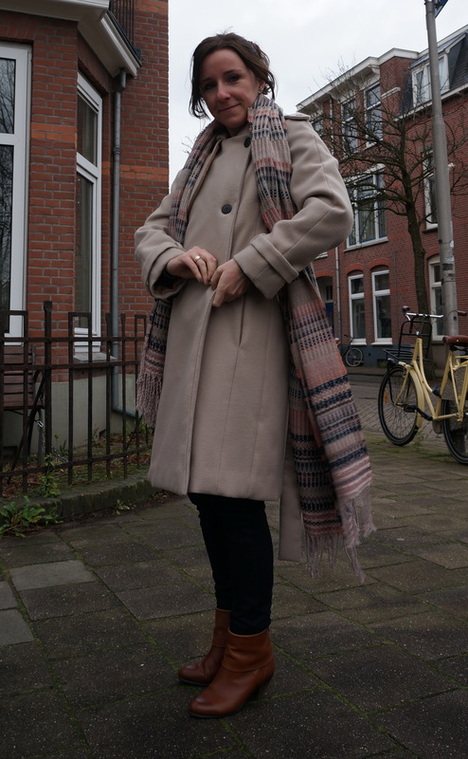
It is accomplished! I finally, finally finished my trench coat. What an immense project it was! Before I jump into all the details of the assembly, I thought it would be nice to give you a tiny little bit of historical background. After some research (i.e. Googling) I found that the trench coat was designed for the British army in WW I, as an alternative to the heavier greatcoat army officials wore. Burberry designed it by the way, and he also invented gabardine. How cool is that? It is called trench coat because of this war (soldiers lived in trenches and operated from them for months on end). The modern trench coat still often has features from the military time, such as epaullets, a capelet to cover from rain, wrist bands and a belt.
Now, some historical facts for my trench coat:
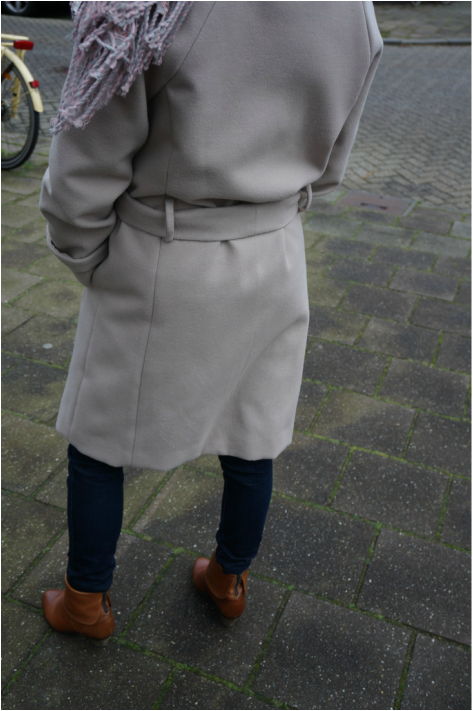
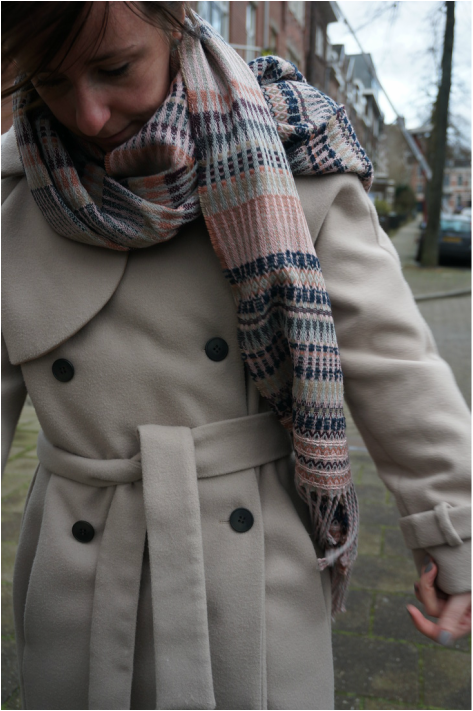
Pattern: I chose this Burda pattern (9/2012 #103) and I discovered it has some really traditional details, such as raglan sleeves! I am very pro raglan sleeves as they are MUCH easier to put in.
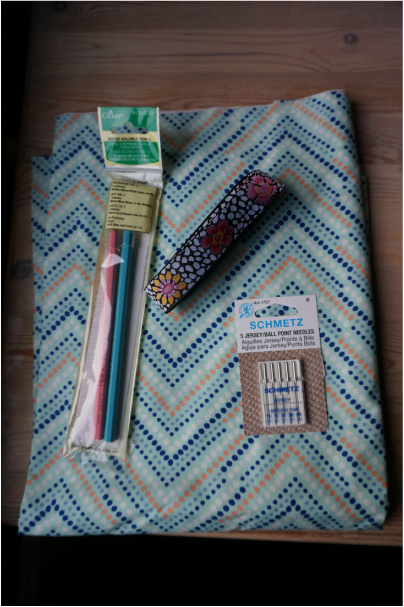
Fabric: I used 3 metres of a taupe coloured wool imitation (synthetic, I have no idea which fiber) as I was not going to buy expensive fabric and then ruin it, and a regular satin lining (also synthetic). I had some regular, iron-on interfacing in the stash and used that on the collar and facings. I found the buttons on the market. Total costs: about 60-70 euros.
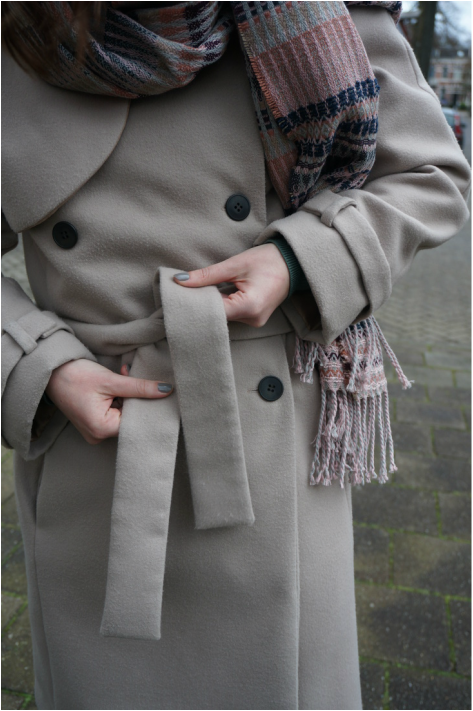
Time: I started the project in September. It took me an afternoon to tape the pattern together, another day to cut all the fabric, and I can't honestly remember how many days I spend on the assembly. Maybe 10-15 afternoons/evenings? Something like turning and hand sewing on the belt loops (times 4) took me a full Sunday!
Size/adjustments: I cut a size 36 (but I am a size 34 really), so I knew beforehand I had to do some adjustments. When I first put it on it looked like I was wearing my grandpas old coat, it was so wide! I am not a star in adjusting patterns (or bothering to make a muslin, blush) so I took the sides and the sleeves in by 1 cm (so 2 cm in total), and I made sure the seams matched when putting in the sleeves.
Hanging loop: even though I am more likely to hang it on a coat hanger, I made a loop out of leopard print bias tape (yay) and sewed it in under the collar last minute.
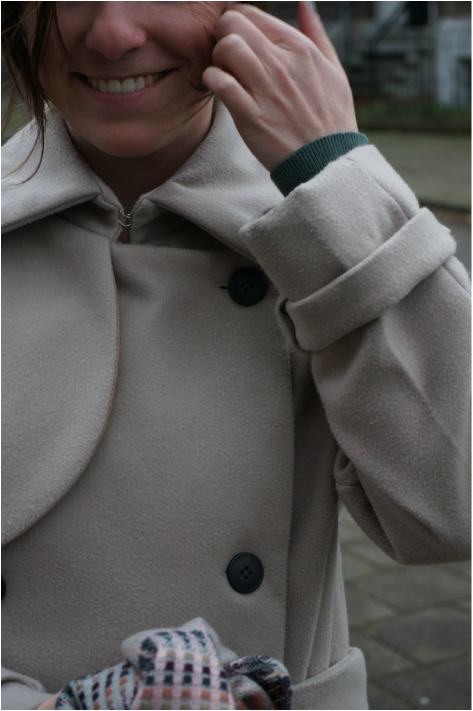
Mistakes made: nothing that couldn't be corrected.. though I have to say it was challenging sometimes to sew with thick fabric. When it's hanging down, it pulls and makes your seams go wrong! And to trim it so the seams don't look bulky is quite hard as well. So I have to admit I learned a lot from it. The buttonholes were a great challenge, I eventually chose machine made (because my hand sewing is still way too ugly), which took much patience and supporting the coat to aid the fabric transport. A few went wrong and I had to unpick them.
Make again: not this pattern, but maybe a coat that has a more tailored fit and is more A-linish, with more expensive fabric.. But first in line is the Emery Dress!
Pattern: I chose this Burda pattern (9/2012 #103) and I discovered it has some really traditional details, such as raglan sleeves! I am very pro raglan sleeves as they are MUCH easier to put in.
Fabric: I used 3 metres of a taupe coloured wool imitation (synthetic, I have no idea which fiber) as I was not going to buy expensive fabric and then ruin it, and a regular satin lining (also synthetic). I had some regular, iron-on interfacing in the stash and used that on the collar and facings. I found the buttons on the market. Total costs: about 60-70 euros.
Time: I started the project in September. It took me an afternoon to tape the pattern together, another day to cut all the fabric, and I can't honestly remember how many days I spend on the assembly. Maybe 10-15 afternoons/evenings? Something like turning and hand sewing on the belt loops (times 4) took me a full Sunday!
Size/adjustments: I cut a size 36 (but I am a size 34 really), so I knew beforehand I had to do some adjustments. When I first put it on it looked like I was wearing my grandpas old coat, it was so wide! I am not a star in adjusting patterns (or bothering to make a muslin, blush) so I took the sides and the sleeves in by 1 cm (so 2 cm in total), and I made sure the seams matched when putting in the sleeves.
Hanging loop: even though I am more likely to hang it on a coat hanger, I made a loop out of leopard print bias tape (yay) and sewed it in under the collar last minute.
Mistakes made: nothing that couldn't be corrected.. though I have to say it was challenging sometimes to sew with thick fabric. When it's hanging down, it pulls and makes your seams go wrong! And to trim it so the seams don't look bulky is quite hard as well. So I have to admit I learned a lot from it. The buttonholes were a great challenge, I eventually chose machine made (because my hand sewing is still way too ugly), which took much patience and supporting the coat to aid the fabric transport. A few went wrong and I had to unpick them.
Make again: not this pattern, but maybe a coat that has a more tailored fit and is more A-linish, with more expensive fabric.. But first in line is the Emery Dress!
Because I didn't want to loose my interest in the project and let it turn into a UFO, I tried to focus on it and not let myself be distracted by too many side projects (I did once, by making the Forest Green Zinnia). It took me weeks to get myself to put in the buttonholes! At first I didn't really love the pattern because it turned out a little masculine, but I have to say, the more I wear it, the more I start to like it!
What is your experience with sewing coats? Too much work or definitely worth the effort?
NB: All photos were taken with the Sony NEX 6 by my hubbie (check out his (Dutch) travel photography website at Pocopoco !).
What is your experience with sewing coats? Too much work or definitely worth the effort?
NB: All photos were taken with the Sony NEX 6 by my hubbie (check out his (Dutch) travel photography website at Pocopoco !).


 RSS Feed